Sharpening
How to Sharpen Japanese Chisels
The back of a Japanese chisel is deliberately hollow and the steel at the edge is glass-hard. Both facts change what you do on the stone, and getting either wrong ruins the tool.
We earn a commission when you buy through our Amazon links, at no extra cost to you. It never decides a ranking, and where the best tool in a class is one we earn nothing on, we say so and link it anyway. How this works.
The short answer
Quick picks
| # | Tool | Best for | Per decade | Score | Price |
|---|---|---|---|---|---|
| 01 | No image King KW65 1000/6000 Combination Whetstone The default first waterstone worldwide. A working edge on one side, a polishing edge on the other, a base to stop it sliding, and a price that removes every excuse not to own one. | Best first stone, and possibly your only one | —tier C | 7.8/10 | Check price → |
| 02 | 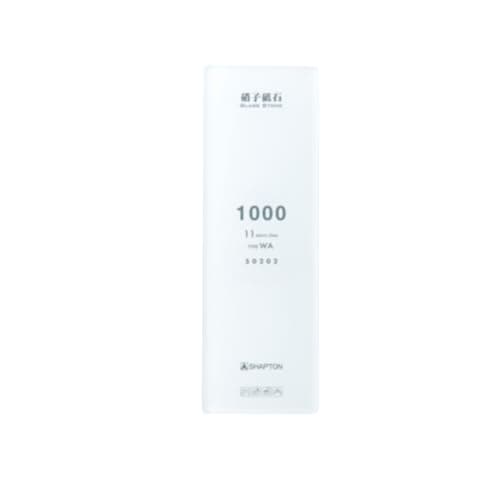 Shapton GlassStone 1000 A thin abrasive layer bonded to a glass plate. It stays flat far longer than a conventional waterstone, cuts fast, and needs only a spritz of water rather than a soak. | Best sharpening stone if you sharpen often | $28.35tier C | 8.2/10 | $56.70Amazon |
| 03 | 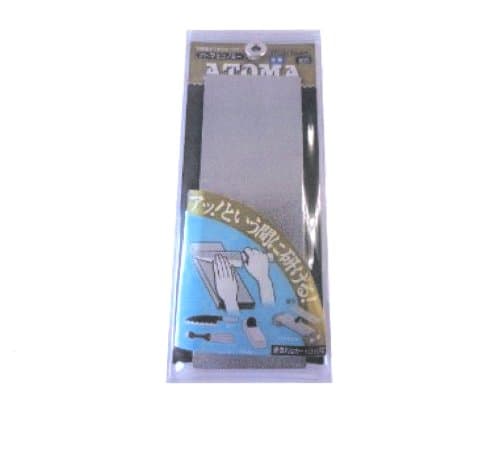 Atoma Diamond Sharpener, #140 Coarse The coarse plate in the range, and the grit Atoma itself puts on stone flattening. The diamond sits in raised clusters with channels between them, so slurry has somewhere to go instead of clogging the plate — which is the entire problem with cheaper flatteners. | Flattening waterstones properly | $37.45tier C | 7.5/10 | $74.90Amazon |
| 04 | 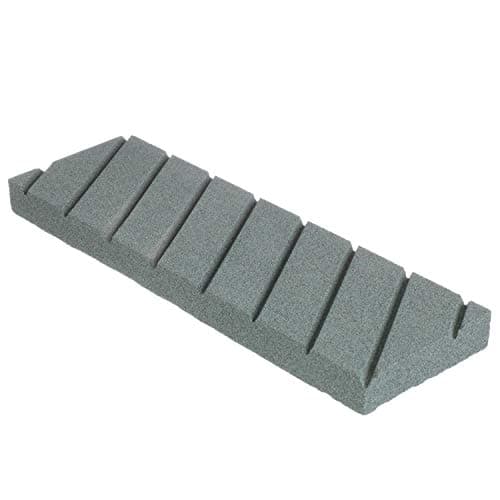 Norton Waterstone Flattening Stone with Holder A coarse silicon carbide block for flattening waterstones. It is the least interesting object on this site and skipping it ruins every stone you own. | The purchase that keeps your other stones honest | $37.99tier D | 8.3/10 | $37.99Amazon |
#ad· Live prices from the Amazon Product API, as of October 16, 2026. Where we have no verified live price we show none, and the cost-per-decade figure is suppressed with it — we would rather leave a gap than print a number that has rotted.
Sharpen a Japanese chisel at 27 to 30 degrees, work the hollow back on a dead-flat stone only at the very edge, and never try to lap the hollow out. If you are buying stones for the job, the King KW65 1000/6000 combination is the pick for most people — it is the default first waterstone worldwide and it will sharpen these chisels properly — with a flattening stone bought at the same time, because a dished stone is how a flat-backed chisel stops being flat.
Everything that makes a Japanese chisel different from a western one shows up on the stone. A western bench chisel is a single piece of fairly hard steel with a flat back and a bevel you grind at 25 to 30 degrees. A Japanese chisel is two metals forge-welded together: a thin layer of very hard, high-carbon steel — the hagane— laminated to a thick body of soft iron or mild steel, the jigane. The hard layer is at the cutting edge and is typically taken to a higher hardness than any western chisel steel; the soft layer is everything behind it, and it exists so the hard steel can be that hard without the whole tool being brittle. And the back is not flat: it is ground with a shallow hollow, the urasuki, leaving a narrow flat land around the perimeter. Japanese vs western chisels covers why the two traditions diverged.
The hollow back, and the mistake that destroys the chisel
The urasuki is the cleverest thing about the tool. Because only a narrow land around the edge touches the stone, flattening the back is quick — you are lapping a few square millimeters rather than the whole face — and it stays flat with almost no work for the life of the chisel. Western chisels, with their full flat backs, need the whole face lapped once and frequently need real work out of the box.
The mistake is to treat the hollow as a defect and try to lap it out. It will take hours, it will cut through the hard laminated layer in places, and the result is a chisel with no hollow, no reference land, and a back that will never be flat again. Work the back only until the land at the cutting edge is bright and flat for a millimeter or two. That is finished. Stop.
There is one more consequence. Every time you sharpen the bevel you move the edge back, and the land at the edge gets narrower — until eventually the hollow reaches the cutting edge and there is no flat left to register. That is the point at which a Japanese chisel needs tapping out: the soft iron behind the edge is peened with a light hammer on a small anvil to push metal forward, re-forming a land, which is then lapped flat again. It is a real technique with a real failure mode — hit the hard steel and it chips — and it is not something to do in your first year. For most owners it is twenty or thirty sharpenings away. The Japanese chisel roundup explains which of these tools are laminated and which are not.
The bevel angle, in numbers
Japanese chisels are usually supplied at around 27 to 30 degrees, and that is a deliberately steeper range than the 25 degrees typical on a western bench chisel. The reason is the steel: harder steel holds an edge longer and chips more readily, so it needs more metal behind the edge to support it. Grinding a laminated Japanese chisel down to 25 degrees in pursuit of keenness is a reliable way to spend an evening chasing chips out of the edge.
- Paring chisels and soft-wood work: 27 to 28 degrees. The shallowest you should go.
- General bench work: 30 degrees. If you only remember one number, remember this one.
- Mortise chisels and hardwood chopping: 32 to 35 degrees. More support, fewer chips, and you lose nothing you will notice.
- A micro-bevel on top:one or two degrees steeper than the primary. It cuts the honing time dramatically, and on hard laminated steel that matters more than it does on a western chisel — microbevels explained covers the mechanics.
Our sharpening angles page has the equivalent numbers for every other edge tool on this site.
The sequence, start to finish
One: flatten the stone. Before touching the chisel. A waterstone that has dished by half a millimeter will put a curve into the back of your chisel, and on a hollow-backed chisel the land is so narrow that a dished stone can round the actual cutting edge in seconds. How to flatten a waterstone covers the method; the Norton flattening stone or an Atoma #140 plate are the two tools for it.
Two: the back, lightly. Lay the back flat on the 1000 grit and work it until the land along the cutting edge is uniformly bright. Then do the same on the 6000. A couple of minutes, not an hour. If the land is bright except for a dark patch right at the corner, that corner is below the plane of the land and the bevel work in the next step will bring it up.
Three: the bevel. Either freehand, with the bevel registered flat on the stone and your wrists locked, or in a guide. Both work; a guide gets you a repeatable angle before you have the muscle memory to hold one, and a guide that will hold a short, thick Japanese chisel is worth checking before you buy — see the honing guide roundup and freehand vs honing guide. Work the 1000 until a burr forms along the full width of the edge, then move to the 6000.
Four: remove the burr from the back. Two or three light passes with the back flat on the fine stone. Not more — this is the step where people quietly round the edge they just made.
Five: strop, if you strop. Leather and compound will take a Japanese edge further than most stones will, and the risk is the same as always: pressure plus a soft surface equals a rounded edge. Stropping explained covers doing it without that happening.
Which stones, and why these
Hard laminated steel rewards a stone that cuts rather than one that polishes, and it punishes a stone that will not stay flat. That gives three sensible setups.
| Stone | Grit as published | Maintenance | Who it is for |
|---|---|---|---|
| King KW65 combination | 1000 / 6000 | Soaks; dishes and needs flattening | First and possibly only stone |
| Shapton GlassStone 1000 | 1000 | Splash and go; stays flat far longer | Anyone sharpening often |
| Atoma #140 diamond plate | #140 coarse | None; it is the flattener | Flattening stones, and heavy regrinds |
| Norton flattening stone | Coarse silicon carbide | None | The cheap way to keep a waterstone true |
The honest ranking: buy the King and the Norton flattening stone together and you can sharpen these chisels properly for the price of a cheap chisel. Buy the Shapton if you sharpen weekly and resent soaking a stone — it cuts faster, stays flatter, and its own cons note what you are paying for, which is a thin and visibly finite abrasive layer. Buy the Atoma if you own several waterstones or need to regrind a chipped edge. If you would rather never maintain a stone at all, diamond plates are the alternative and waterstones vs diamond stones and ceramic vs waterstones make that comparison properly.
Three things not to do
Do not put a Japanese chisel on a dry bench grinder. The hard layer is thin and it will overheat in seconds, and an overheated edge is a soft edge permanently. If an edge needs regrinding, do it on a coarse stone or a diamond plate, wet, slowly. Our grinder roundup is written for western chisels and says the same thing about heat.
Do not round the bevel chasing speed. A rounded bevel on a laminated chisel means the hard steel at the very edge is unsupported, and it will chip the first time you lever a chip out of a mortise.
Do not use the hooped end as a general striking surface for a steel hammer unless the chisel has the hoop. Most laminated bench chisels do; some paring chisels deliberately do not and are never meant to be struck. Chisel handle materials tells you which is which, and the mallet roundup covers what to hit each type with.
Questions
Frequently asked
What angle should a Japanese chisel be sharpened at?
Around 30 degrees for general bench work, 27 to 28 for paring, and 32 to 35 for mortise chisels and hardwood chopping. That is steeper than the 25 degrees usual on western chisels, and deliberately so: the laminated hard steel holds an edge longer and chips more easily, so it needs more metal behind it.
Should I flatten the hollow on the back of a Japanese chisel?
No. The hollow — the urasuki — is a designed feature, and lapping it away ruins the chisel. Flatten only the narrow land around the cutting edge, and only until it is uniformly bright for a millimeter or two. That land is both the reference surface and the part doing the cutting.
What is tapping out, and do I need to do it?
Tapping out is peening the soft iron behind the cutting edge with a light hammer to push metal forward, re-forming the flat land after many sharpenings have consumed it. You will not need it for a long time — tens of sharpenings — and it is worth watching someone do it before you try, because striking the hard laminated steel chips it.
Can I use a honing guide on Japanese chisels?
Yes, if the guide will hold them. Japanese bench chisels are often shorter and thicker than western ones, and some jaws grip them poorly. Check the published capacity before buying: an Eclipse-pattern guide handles most sizes, and very short or very wide chisels are the ones to watch.
Which stones are best for Japanese chisels?
A 1000 grit for the work and a 6000 for the finish, on a stone you are willing to keep flat. A King 1000/6000 combination does both at the lowest price; a Shapton glass stone cuts faster and stays flatter if you sharpen often. The non-negotiable purchase is something to flatten the stone with — a flattening stone or a coarse diamond plate.
Why does my Japanese chisel keep chipping?
Three likely causes, in order. The bevel is too shallow for the steel — take it to 30 degrees or more. The bevel is rounded, leaving the edge unsupported. Or the chisel is being used as a lever to pop waste out of a mortise, which is what a mortise chisel is built for and a laminated bench chisel is not.
Receipts
Sources
- Sharpening Supplies — Atoma Diamond Plate (grits 140, 400, 600 and 1200; 210 mm x 75 mm; a 1 mm stainless steel diamond sheet mounted on 10 mm precision flattened aluminium; 'precisely placed clusters of monocrystalline diamonds' whose 'geometric patterning creates channels between the clusters for waste material to collect'; #140 'for aggressive material removal reshaping edges or flattening stones'; replacement diamond sheets sold in all four grits). Retrieved 2026-08-28.
- Schilbach — Ioroi nomi Japanese chisels ('hand-forged by Mr. Ioroi in a small forge in Japan', Miki; blade 'forge-welded by hand from two layers', a soft carrier layer and a hard cutting layer of Hitachi white paper steel; red oak handle and steel hoop; hollow ground on the mirror side). Retrieved 2026-08-28.
- KAKURI Corporation — Hand Planes AOGAMI (Blue Paper Steel) #2 ("The blade of this plane is expertly crafted with two layers of AOGAMI (Blue Paper Steel) #2 and soft iron, making it an extremely sharp tool"; oak body; 42 mm / 48 mm / 58 mm blade widths at 36 / 42 / 48 mm cutting width; bodies 54 x 180, 62 x 210 and 72 x 255 mm; 320 g, 470 g, 890 g; ¥9,500 in every size — roughly twice the SK85 planes). Retrieved 2026-09-24.
- DMT Diamond Sharpeners — Bench Stones (manufactured in the USA, Marlborough MA). Retrieved 2026-07-24.
- Amazon listing for King KW65 1000/6000 Combination Whetstone — specifications and price basis, retrieved via the Amazon Product API on 2026-07-24 and refreshed on the daily price check.
- Amazon listing for Shapton GlassStone 1000 — specifications and price basis, retrieved via the Amazon Product API on 2026-07-24 and refreshed on the daily price check.
- Amazon listing for Atoma Diamond Sharpener, #140 Coarse — specifications and price basis, retrieved via the Amazon Product API on 2026-07-24 and refreshed on the daily price check.
- Amazon listing for Norton Waterstone Flattening Stone with Holder — specifications and price basis, retrieved via the Amazon Product API on 2026-07-24 and refreshed on the daily price check.
We have not handled these tools. Nobody here has tested one, owned one, or taken one apart. Specifications come from the manufacturer or the retailer listing; warranty terms come from the maker's own warranty page; the cost-per-decade arithmetic is ours and reproducible. Where we could not verify a figure we say so on the page rather than quietly leaving it out. Read the full method.
Keep reading
Related
- Sharpening angles explainedEvery bevel angle on this site, in one table.
- The best Japanese chiselsWhich of these tools are laminated, and which to buy.
- How to flatten a chisel backThe western version of this job, which is much more work.
- How to flatten a waterstoneStep one, every time, and the one people skip.
- Ceramic vs waterstonesIf you would rather not maintain a soaking stone.
- Microbevels explainedThe two degrees that cut honing time on hard steel.
Back to Sharpening · how we pick · editorial policy