Sharpening
How to Camber a Plane Iron
A straight-across iron leaves two tracks and jams in a thick shaving. The fix is a deliberate curve, and how much of it depends entirely on which plane the iron lives in.
We earn a commission when you buy through our Amazon links, at no extra cost to you. It never decides a ranking, and where the best tool in a class is one we earn nothing on, we say so and link it anyway. How this works.
The short answer
Quick picks
| # | Tool | Best for | Per decade | Score | Price |
|---|---|---|---|---|---|
| 01 | 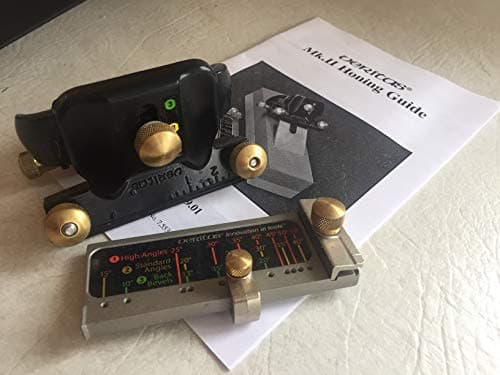 Veritas Mk.II Honing System A registration jig that sets projection and angle repeatably, plus a micro-bevel mechanism that adds a couple of degrees without resetting anything. It is the guide that makes sharpening boring, which is the goal. | Best honing guide | $56.58tier C | 8.4/10 | $113.16Amazon |
| 02 | No image King KW65 1000/6000 Combination Whetstone The default first waterstone worldwide. A working edge on one side, a polishing edge on the other, a base to stop it sliding, and a price that removes every excuse not to own one. | Best first stone, and possibly your only one | —tier C | 7.8/10 | Check price → |
| 03 | 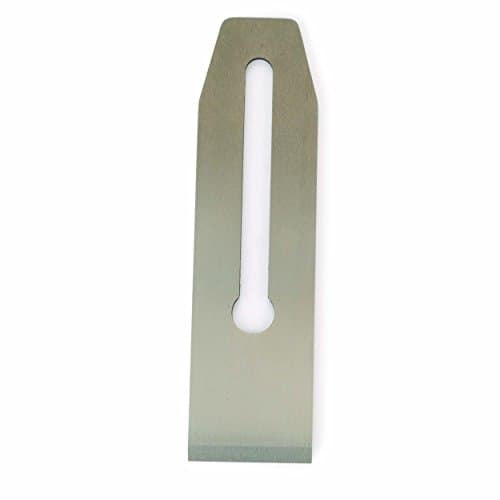 WoodRiver V3 Replacement Blade, No. 4 / No. 5 The correct spare for a WoodRiver V3 smoother or jack, and the reason that plane rates as a long-horizon tool at all: the wear part is purchasable. What Woodcraft will not tell you is what it is made of. The specification reads 'hardened, precision-ground steel' and a 25 degree bevel, and stops there. | Owners of a WoodRiver V3 who want the factory part | $15.99tier C | 6.2/10 | $31.98Amazon |
#ad· Live prices from the Amazon Product API, as of October 16, 2026. Where we have no verified live price we show none, and the cost-per-decade figure is suppressed with it — we would rather leave a gap than print a number that has rotted.
Camber a jack plane iron to roughly an 8 to 10 inch radius, a jointer iron just enough to relieve the corners, and a smoother iron so slightly that you can barely see it. If you want the curve to be repeatable rather than a happy accident, the tool that does it is a honing guide with a micro-bevel mechanism — the Veritas Mk.II is the pick — and the cheapest honest way to practice is on a spare iron rather than the one in your plane.
Camber is the single highest-leverage thing most plane owners have never done to their irons. Sharpen an iron dead straight across, set it for a thick shaving, and the corners of the iron dig in: you get two parallel tracks in the work and a plane that stalls. Set the same iron for a shaving thin enough that the corners do not register, and the plane barely cuts. A curved edge solves both at once, because the cut tapers to nothing at the sides — the shaving is thick in the middle, feathers out at the edges, and the plane can be driven hard without leaving a step.
How much curve, by plane
The amount is not a matter of taste; it follows from what the plane is for. The useful way to think about it is how much deeper the center of the iron is cutting than the corners.
- Scrub plane — a pronounced curve, roughly a 3 inch radius. A scrub takes a deep narrow shaving on purpose. If your scrub iron looks alarming, it is probably right — see what is a scrub plane.
- Jack plane for roughing — an 8 to 10 inch radius. The workhorse camber, and the one that makes flattening rough lumber by hand possible. Enough to remove material fast across the grain; not so much that the scallops take forever to clean up.
- Fore or jointer plane — corner relief only. A long plane is straightening an edge, so a pronounced curve is the enemy: it would cut a hollow down the middle of the edge. What you want is enough curve to stop the corners leaving tracks, and no more. The practical benefit is that you can steer the cut — shifting the iron laterally takes more off one side of an out-of-square edge, which is how a jointer plane squares an edge without the plane being tilted.
- Smoothing plane — barely visible. A smoother takes shavings measured in thousandths, and the only job of the camber is to keep the corners from leaving a faint step at the edge of each pass. A couple of extra strokes on each corner of the bevel is genuinely enough.
- Block plane — usually none, or corner relief. A block plane is often used to cut right to a line, and a cambered edge makes that harder. Ease the corners so they cannot score the work and leave the rest straight. The same logic applies to shoulder planes, where the iron must be straight and full-width by definition.
One geometric footnote worth knowing: on a bevel-up plane the camber you grind appears amplified in the cut compared to the same curve on a bevel-down iron, because of the shallow bed angle. If you are cambering an iron for a No. 62 or a low-angle block plane, start with less curve than you think and sneak up on it — bevel up vs bevel down explains the geometry.
Three ways to grind it
Freehand on a coarse stone, with finger pressure. The traditional method and the one that needs no equipment: hone the bevel normally, then take a few strokes with pressure concentrated over the left corner, a few with pressure over the right, and a few in the middle. The abrasive removes more where the pressure is, and a curve appears. It is quick, it is free, and it is not very repeatable — freehand vs honing guide is the honest comparison.
In a honing guide, by rolling the pressure. Clamp the iron in the guide as usual, then do the same thing: weight the left corner for a set of strokes, the right corner for a set, the middle for a set. The guide holds the angle while you vary where the metal comes off, which gives you a curve at a known bevel angle. This is the method we would recommend to anyone who wants the result to be the same twice, and how to use a honing guide covers the setup.
On a grinder, with the wheel. For a heavy camber — a scrub, or a jack iron being cambered from scratch — removing that much steel on a stone takes a long time. A grinder does it in a minute, with the standing risk that overheating the edge ruins the temper: light passes, frequent dipping, and stop while the steel is still cool enough to touch. Our bench grinder roundup is mostly about heat control for exactly this reason.
Keeping the camber once you have it
The usual way a camber disappears is honing. Each sharpening session is a chance to flatten the curve back out without noticing, especially if you work the middle of the bevel harder than the corners because that is where the wear looks worst. Two habits prevent it.
First, hone with the same pressure pattern you used to create the curve — corners, corners, middle — rather than straight strokes. Second, use a micro-bevel. A micro-bevel means you are only ever honing a narrow strip at the very edge, which takes a fraction of the time and makes it far harder to accidentally change the shape of the primary bevel; microbevels explainedhas the mechanics, and the Veritas Mk.II's eccentric roller exists specifically to add those two degrees without resetting anything.
A note on the back of the iron. The ruler trick— lifting the iron onto a thin steel rule so the back is honed at a fraction of a degree — is a legitimate time saver on a plane iron and is not something to do on a chisel. It works with a cambered iron exactly as it does with a straight one.
Why a spare iron is the real answer
Here is the thing nobody mentions when they tell you to camber a jack iron: the camber is not reversible in any quick sense. An iron ground to a 10 inch radius is not the iron you want for finish work, and grinding it back straight is twenty minutes of metal removal. So the sensible version of this advice is to own two irons for the plane you use most: one cambered for roughing, one nearly straight for finishing, swapped in thirty seconds.
That turns the camber question into a parts question, which is where this site always ends up. Jorgensen publishes a numbered O1 replacement iron. Woodcraft sells the WoodRiver V3 iron for the No. 4 and No. 5 as its own item, though — as its cons say — it publishes neither the steel grade, the hardness nor the thickness. Taytools states its basic irons do not fit its Bedrock planes. The replacement iron roundup tracks which planes have a purchasable wear part, and A2 vs O1 steelcovers which steel takes a camber more easily — O1 grinds and hones faster, A2 holds the edge longer.
| Plane | Camber | Why |
|---|---|---|
| Scrub | About a 3 in radius | Deep narrow shavings, by design |
| Jack (roughing) | 8 to 10 in radius | Fast removal without corner tracks |
| Fore / jointer | Corner relief only | Straight edges; lateral steering |
| Smoother | Barely visible | No step at the edge of a pass |
| Block / shoulder | None; ease the corners | Must cut square and to a line |
Questions
Frequently asked
What radius should a jack plane iron be cambered to?
Roughly an 8 to 10 inch radius for general roughing work — enough that a thick shaving feathers out at the edges instead of leaving two tracks. A scrub plane goes much further, around 3 inches. A smoother goes almost nowhere: a few extra strokes on each corner.
Do smoothing plane irons need camber?
A very small amount, yes. Without it the corners of the iron leave a faint step at the edge of each pass that shows up under a finish. You are relieving the corners rather than curving the edge; if the camber is visible to the eye on a smoother, it is too much.
Can I camber an iron with a honing guide?
Yes, and it is the most repeatable method short of a grinding jig. Clamp the iron as normal, then vary where you put the pressure — a set of strokes weighted on the left corner, a set on the right, a set in the middle. The guide holds the bevel angle while the pressure decides the shape.
Will a cambered iron ruin a jointer plane?
A heavy camber will, because it cuts a hollow along the middle of the edge you are trying to make straight. Light corner relief does the opposite of ruining it: it stops the corners tracking and lets you take more off one side of an out-of-square edge by shifting the iron laterally.
How do I stop losing the camber when I sharpen?
Hone with the same pressure pattern that created it rather than with even straight strokes, and work a micro-bevel so each session only touches a narrow strip at the edge. The more metal you remove from the primary bevel, the more the shape drifts back toward straight.
Receipts
Sources
- Lee Valley Tools — Guarantee & Returns (three-month satisfaction guarantee; not a defect warranty). Retrieved 2026-07-24.
- Woodcraft — WoodRiver V3 replacement blade for No. 4 / No. 5 bench planes (specification reads 'hardened, precision-ground steel' and a 25 degree bevel; the steel grade is not named). Retrieved 2026-08-26.
- Pony Jorgensen — Replacement Blade for No.4 / No.5 Smooth Plane (O1 steel, Rockwell 60-64, 3 mm / 1-8 in thick, 50.8 mm / 2 in wide). Retrieved 2026-08-26.
- Taylor Tools — Taytools replacement plane blades for Stanley, Record and other bench hand planes (five sizes from 1.2 in to 2-3/8 in wide; the #6 / #7 blade is listed at 2-3/8 in wide, 7-5/8 in long and 0.125 in thick, bevel ground to 25 degrees; stated to also fit WoodRiver planes 'as well as some non-vintage Stanley and Record planes' and stated NOT to fit Taytools Bedrock planes; no steel grade is published on the page). Retrieved 2026-08-28.
- Amazon listing for Veritas Mk.II Honing System — specifications and price basis, retrieved via the Amazon Product API on 2026-07-24 and refreshed on the daily price check.
- Amazon listing for King KW65 1000/6000 Combination Whetstone — specifications and price basis, retrieved via the Amazon Product API on 2026-07-24 and refreshed on the daily price check.
- Amazon listing for WoodRiver V3 Replacement Blade, No. 4 / No. 5 — specifications and price basis, retrieved via the Amazon Product API on 2026-07-24 and refreshed on the daily price check.
We have not handled these tools. Nobody here has tested one, owned one, or taken one apart. Specifications come from the manufacturer or the retailer listing; warranty terms come from the maker's own warranty page; the cost-per-decade arithmetic is ours and reproducible. Where we could not verify a figure we say so on the page rather than quietly leaving it out. Read the full method.
Keep reading
Related
- How to sharpen a plane ironThe full sequence this fits into.
- Microbevels explainedHow to hone without flattening the curve back out.
- Flattening rough lumber by handThe job a cambered jack iron exists for.
- The best replacement plane ironsWhy a second iron beats re-grinding the one you have.
- The ruler trickThe back of the iron, in a fraction of the time.
- Freehand vs honing guideWhich method gives you the same curve twice.
Back to Sharpening · how we pick · editorial policy